“Light My Fire” – Grinding, Copper Foiling, and Soldering
- Jan 5, 2024
- 3 min read
So once all the glass is cut, you must grind the edges of each piece with a machine called a “Grinder.” This is so the copper foil tape will adhere to the glass. It has a diamond covered bit hugged with a sponge that sucks up water out of a grid covered reservoir. What???? What was that??? Yeah, it’s loud.

Caitlin grinds glass as I cut and saves me SOOOOO much time. She’s so well taught (swagger) that I don’t even micromanage her anymore, not that I really ever did. She’s a NATURAL. Her grandfather did stained glass, it’s in her blood, and she even brings some of her Papa’s glass with her from time to time to incorporate into her own personal projects. She usually can fit one or two in each time she visits.
Want to ask her about Apprentice Life with me? She and one of my other apprentices, Tina, will BOTH be at LibertyCon and they’re going to be doing some panels with me and you can ask them all about it! No, for real, ask for the tea… I’m not skeered.
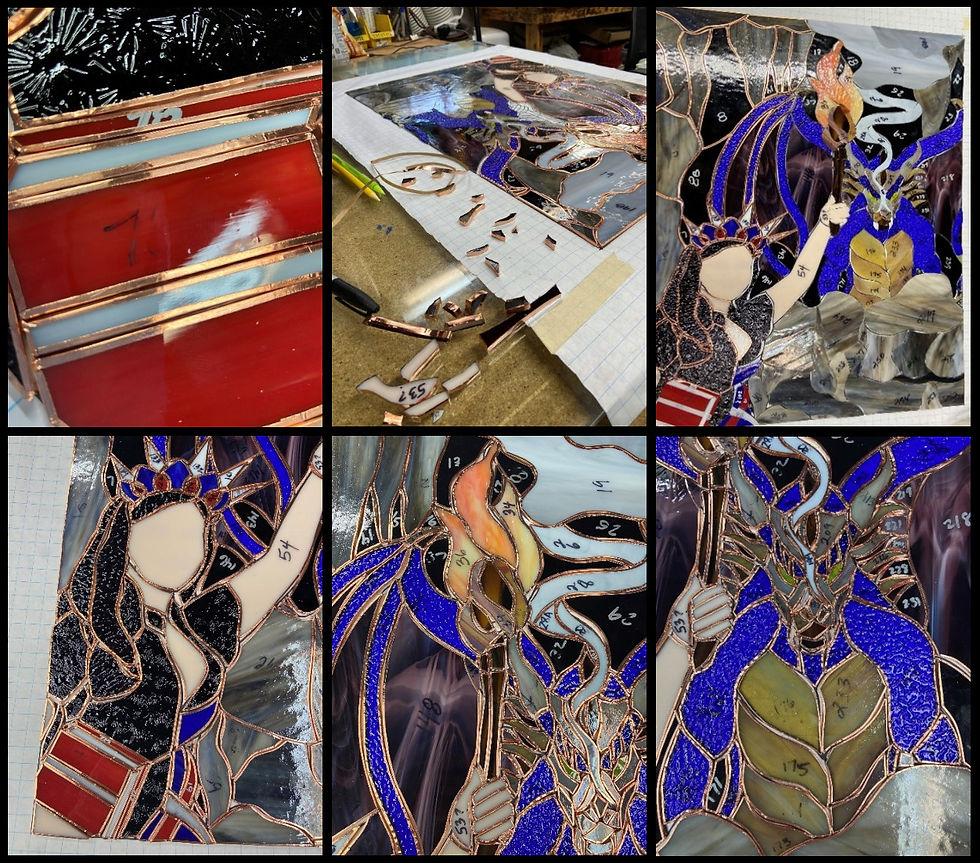
Grinding is kinda boring in pics – you sit there like that for hours, get covered in glass (hence the headband) and rip up your fingertips. It is what it is.
On to Copper foiling!
In around 1925, Louis Comfort Tiffany invented the method of Copper foiling stained glass, so he could make 3-D lamps that the traditional leaded method of glass could not. I’ve been trained in both methods, but copper foil is my go-to, because in case you haven’t noticed, I like detail.
Copper foil is a thin copper strip backed with stickiness. It can be backed in copper, black, or silver, and can range from 3/16” wide to 1” wide. “Light My Fire” is being “wrapped” in 3/16” and 7/32” copper and black respectively. I use 3/16” for tiny pieces or narrow pieces, and 7/32” for everything else. I use the copper-backed foil for anything you can’t see through, and black-backed for everything else. I intend to make the solder lines black so the colors pop more. Using black-backed foil on transparent pieces keeps the eye from being pulled away to a weird strip of copper that shouldn’t be there.
It takes hours to copper foil, as well, but all nearly 300 pieces have to be individually wrapped and burnished. This is what will form the solder lines.
This is why I can’t use fingerprint readers at work and would make a great Cat Burglar.

Time to Solder!

Now, because this window has such long thin pieces, I’m going to be wiggling “Strong Line” steel reinforcement through it from end to end. You ever gone somewhere with old stained glass windows and they’re bending out with cracks all over them? Yeah… not Leia’s windows. I make mine to LAST.
I am also using 60/40 LEAD solder and Classic 100 Gel Flux. Flux is an acid that allows the solder to adhere to the copper.
This means also don’t lick or overly handly my work. Lead is no bueno. Flux in a cut is stingy. We’ll be wearing gloves from here on out.
First order of business, “Tacking”. I marked where my strong line is going to go with big blue arrows, and I tack soldered where every other three pieces meet to hold the window together while I’m soldering.

I left some obvious gaps where I planned to run the Strongline, see below, but as I solder them closed, that gap closes.

The objective to soldering well is for when people look at your lines, they won’t be able to see the cracks between your glass or be able to tell which direction you went with your iron. Your solder lines should be evenly mounded and the same height.
Even though I’m going to patina these solder lines black, “I” will know if I don’t do it right, and the better you solder it, the longer your piece will stand the test of time.
One way to know if a piece of stained glass, especially a lamp, is cheaply made is look at the back or the inside, it’ll usually be black patinaed to hide imperfections, but you’ll still be able to see the groovy between the glass, because they put the bare minimum of solder on it.

One side soldered! I had to text Brandy when I soldered her bewb and apologized. She said I was forgiven, and it didn’t even hurt.
Standing the window up for the first time is always a harrowing experience, because it’s usually unstable with only one side being soldered, but I can already tell the strong line is doing its job. It’s solid.

Now to flip her over and solder the other side.
Stay tuned next time for FINISHING TOUCHES AND FINAL BIG REVEAL!!!
Stay Glassy!
Leia Powell
Artist Guest of Honor LibertyCon 36
Previous post in series: Cutting the Glass
Next post in series: Finishing Touches and the Big Reveal
Comments